How to Calibrate a Broadcast Spreader in 10 Minutes (The Method That Actually Works)
The number on the back of your fertilizer bag is a suggestion. Not a fact. It was calculated in a lab with a factory-new spreader at a precise walking speed by someone who has never seen your lawn. The moment you open that bag and start pushing, your actual application rate could be 20%, 40%, or even 67% off from what the label says. The only way to know what your spreader actually delivers is to test it. And it takes 10 minutes.
The Cornell 25-foot calibration method is the fastest and most reliable way to know exactly what your broadcast spreader delivers at any setting. Load a weighed amount of product, walk a 25-foot test strip, measure the spread width, weigh what remains, and calculate your actual rate in pounds per 1,000 square feet. The entire process takes 10 minutes with a bathroom scale and a tape measure. You need to do this for every product you use because different granule sizes and densities flow differently through the same gate opening.
Why Bag Settings Fail (And Why It Matters)
A homeowner on a popular lawn forum ran the exact bag-recommended setting for his Lesco spreader (setting 19 for 3.5 lbs/1,000). When he weighed the output, his spreader delivered 5.83 lbs/1,000. That is 67% more product than the target. He dropped to setting 14 to actually hit 3.7 lbs/1,000.
That is not an unusual result. It is the norm. Bag settings fail because of four variables the manufacturer cannot control:
Walking Speed
Broadcast spreaders are wheel-driven. Faster walking spins the impeller faster and throws product wider. Slower walking concentrates product in a narrower band. Your pace is not the factory test pace.
Spreader Wear
Gate mechanisms loosen over time. Impeller edges dull. Hopper openings warp from UV and temperature cycling. A 3-year-old spreader flows differently than a new one at the same setting.
Product Density
Scotts Turf Builder granules are small and dense. Milorganite granules are large and light. Jonathan Green is somewhere in between. Same gate opening, completely different output in pounds.
Humidity and Clumping
Humid days cause granules to stick together and flow slower. A bag stored in a damp garage flows differently than a fresh bag. Even morning dew on the hopper can change output.
Over-application burns grass, wastes money, and on Long Island it sends excess nitrogen straight into our sole-source aquifer. There is no backup water supply. Under-application wastes your time and money because your lawn never responds the way the product promised. Either way, guessing costs you. Ten minutes with a bathroom scale fixes it permanently for each product you own.
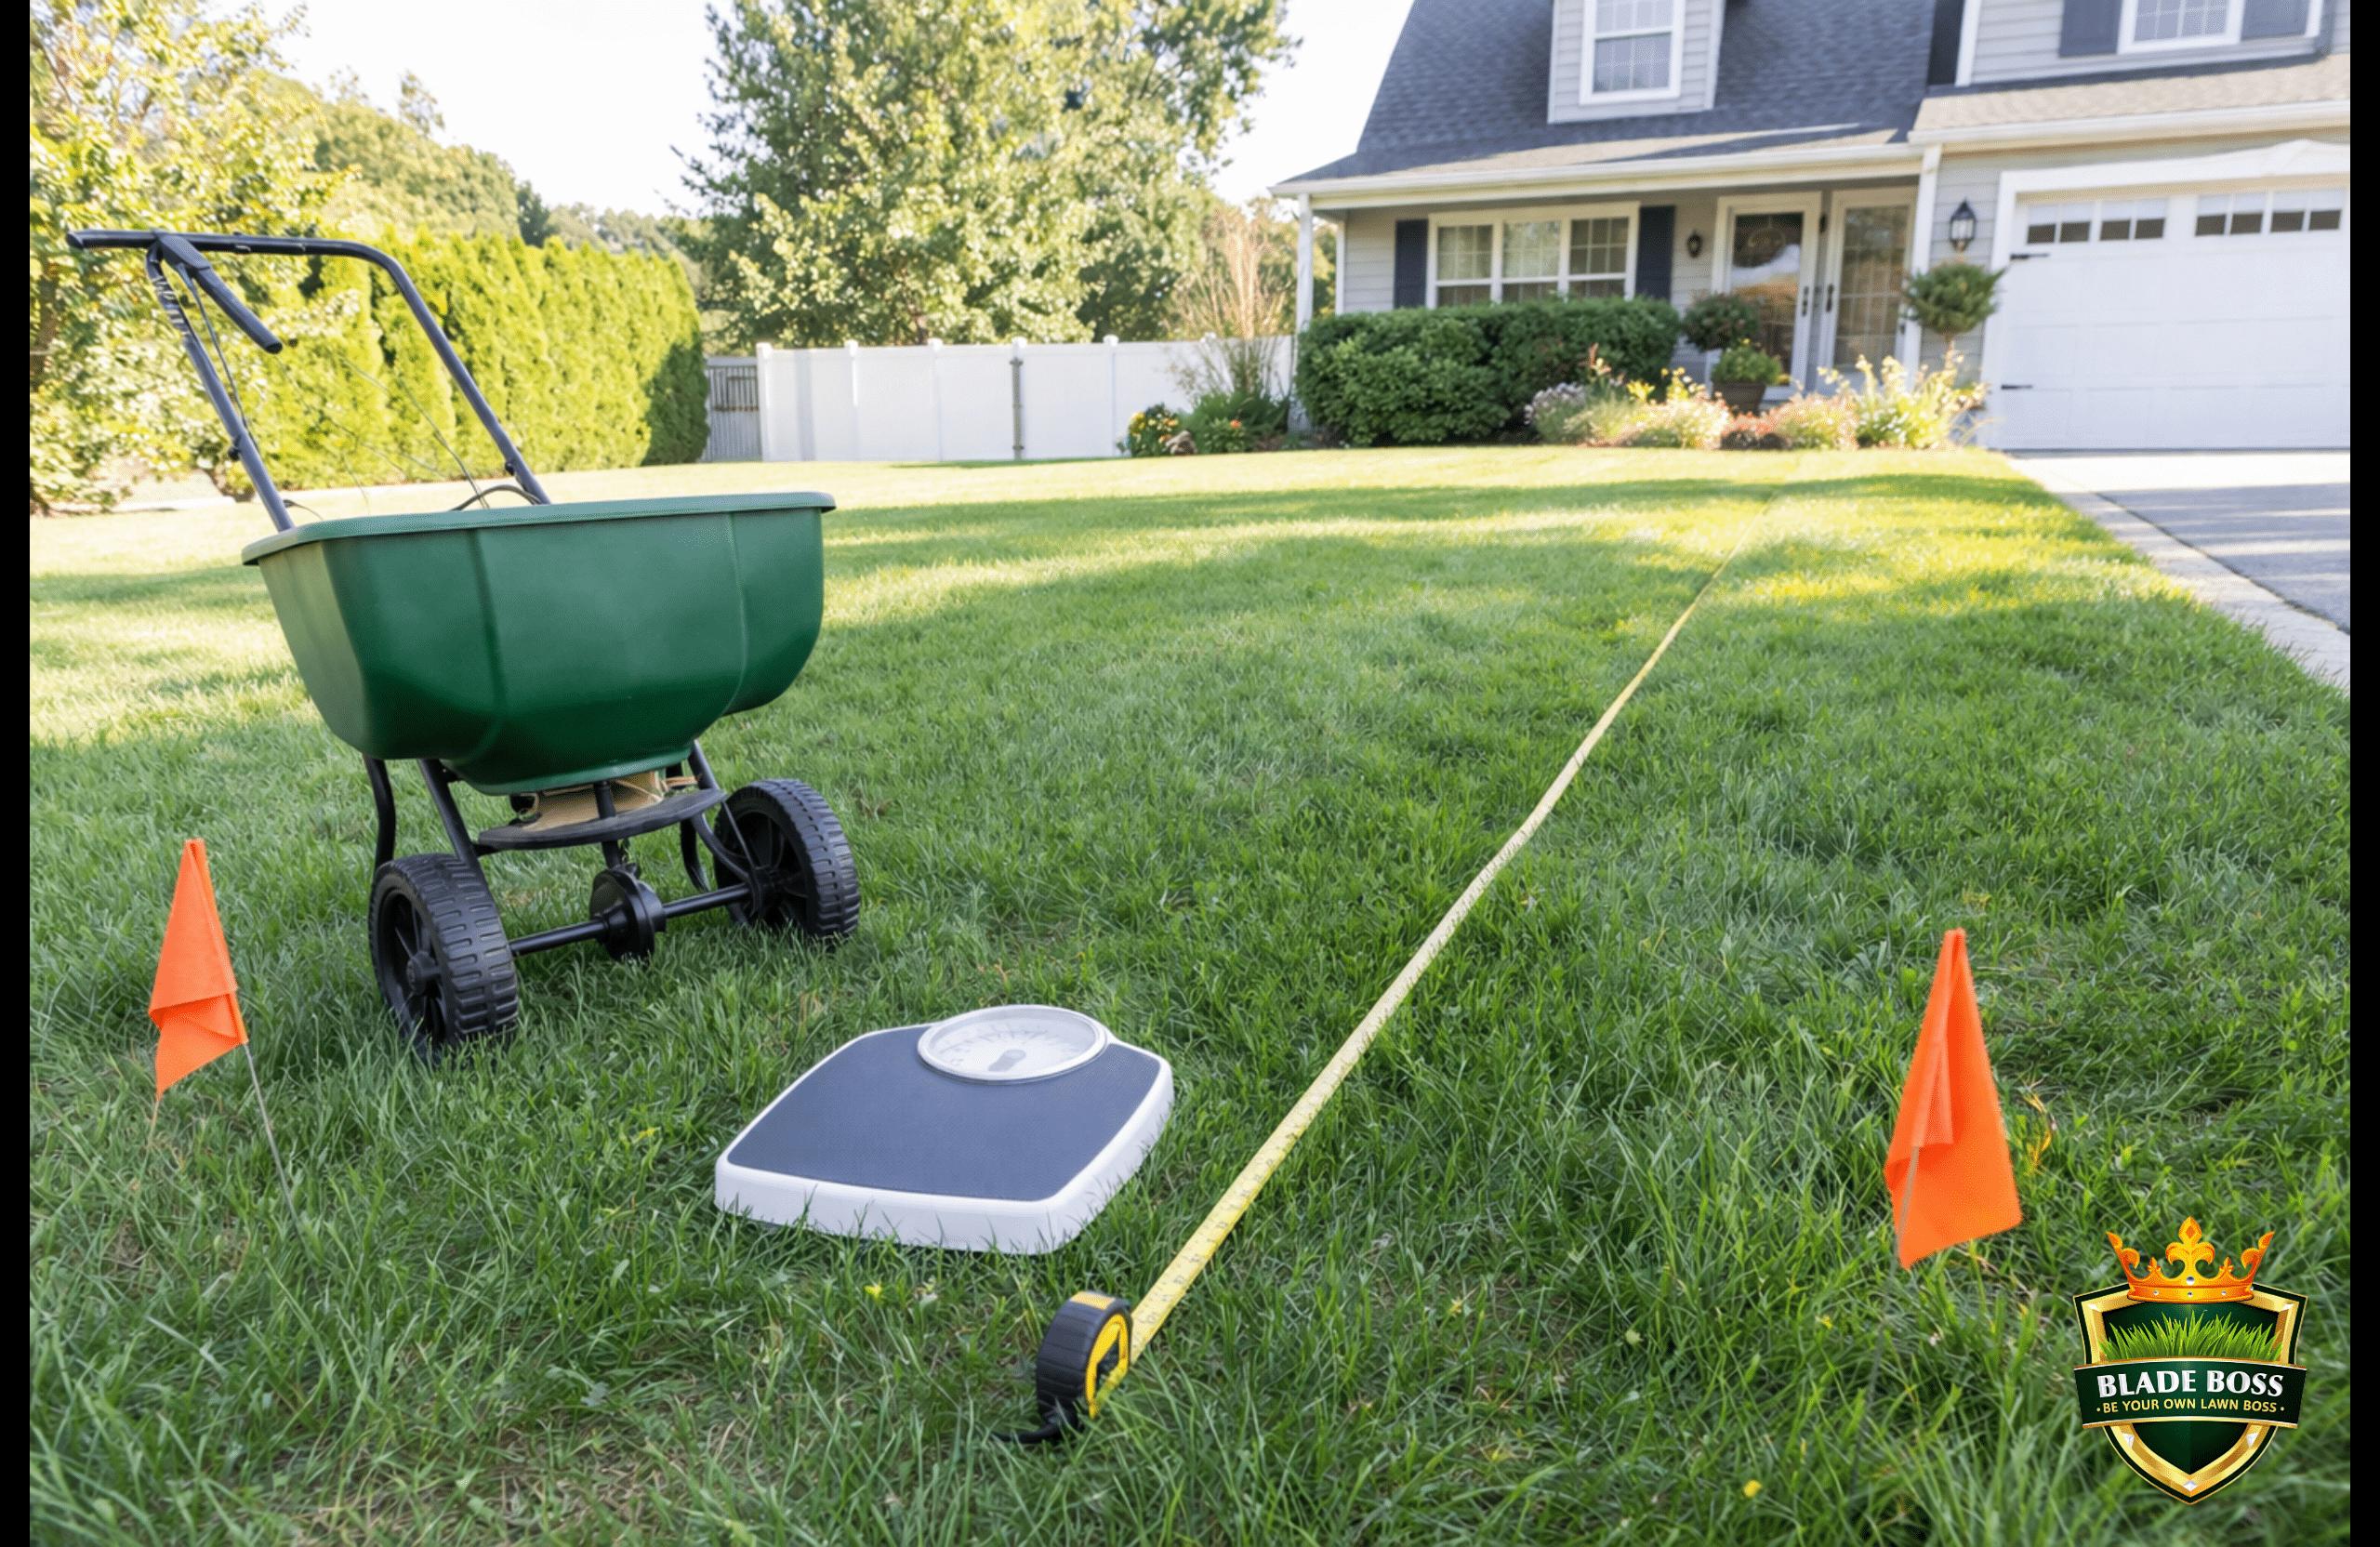
What You Need (4 Items)
- Bathroom scale. Any home scale that reads in pounds and tenths. You are weighing the hopper before and after.
- Tape measure or measuring wheel. To mark 25 feet and measure the spread width.
- Two marker flags or stakes. To mark your 25-foot start and stop points. Sticks, cans, or anything visible works.
- The product you are calibrating for. You will use real product, not a substitute. Different products flow differently.
That is it. No apps, no charts, no calculators. A scale, a tape measure, and 10 minutes.
The 25-Foot Calibration Method (Step by Step)
This method was published by Cornell Cooperative Extension and is the standard calibration procedure taught in professional applicator certification courses. It works for any broadcast spreader (Scotts, Lesco, Echo, Earthway, Spyker) with any granular product.

Know Your Target Rate
Before you touch the spreader, you need to know what you are trying to deliver. Check the bag for the application rate in pounds per 1,000 square feet. If the bag only lists coverage (like 12.5 lbs covers 5,000 sq ft), divide: 12.5 / 5 = 2.5 lbs per 1,000. Write this number down. This is your target.
Set the Dial to the Bag Recommendation
This is your starting point, not your final answer. Set the gate opening to whatever the bag recommends for your spreader model. If your spreader is not listed on the bag, check our spreader settings and conversion chart for cross-brand translations.
Load and Weigh the Hopper
Put exactly 10 lbs of product into the hopper. Weigh the loaded spreader on your bathroom scale. Write down the weight. You do not need exactly 10 lbs, but a round number makes the subtraction math easier when you are standing in your yard with fertilizer dust on your hands.
Mark 25 Feet on Your Lawn
Use a tape measure to set two flags exactly 25 feet apart on a flat, open section of your lawn. Give yourself about 5 to 8 feet of runway before the first flag so you are already at full walking speed when you cross it.
Walk the Test Strip
Start a few feet behind Flag 1. Begin walking at your normal spreading pace. Open the gate as your front wheel crosses Flag 1. Close the gate as your front wheel crosses Flag 2. Do NOT slow down at the flags. Do NOT adjust your pace because you are being 'careful.' Walk exactly the way you would if you were doing the whole lawn. The test only works if you replicate your real behavior.
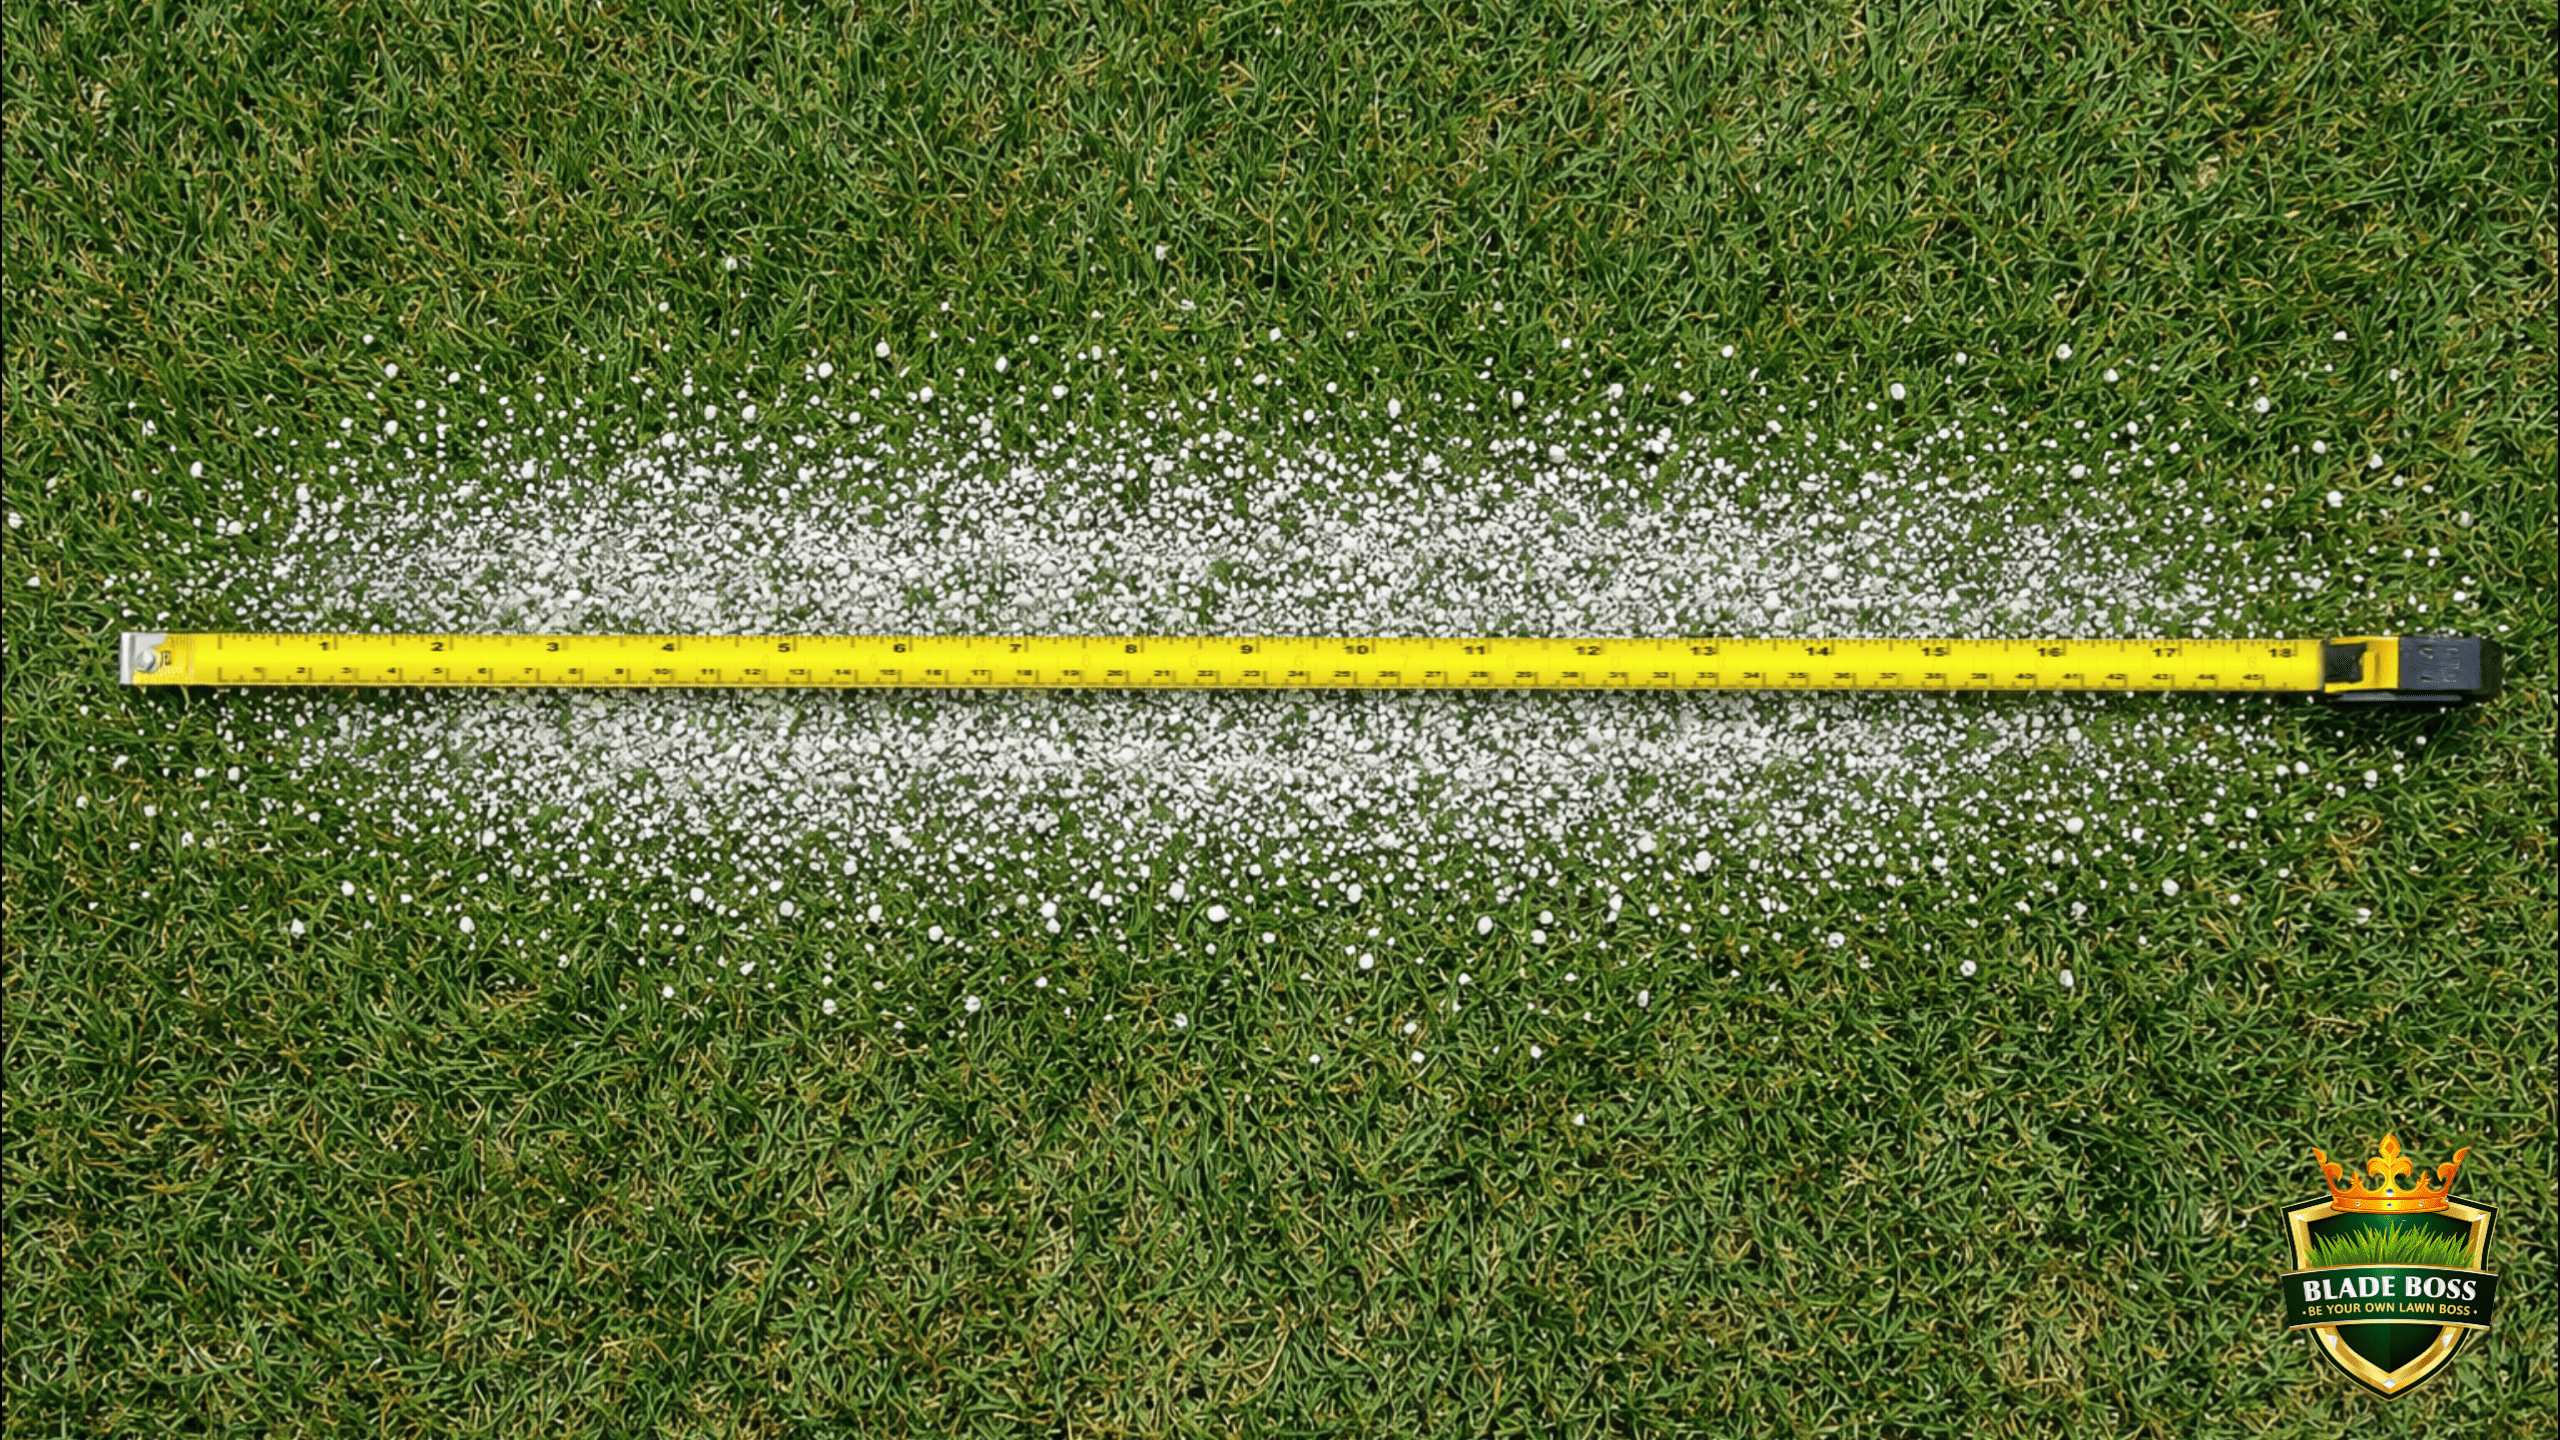
Measure the Spread Width
Walk back to the middle of your test strip. Look at the granule pattern on the grass. You will see a main band of heavy coverage with thinner edges. Stretch your tape measure across the main band, from where granules start to thin on one side to where they thin on the other. This is your effective spread width. A typical Scotts EdgeGuard will throw 5 to 8 feet depending on your walking speed.
Weigh What Remains
Put the spreader back on the bathroom scale. Subtract the new weight from the starting weight. The difference is how many pounds of product you applied across that 25-foot strip. Example: started at 10 lbs, now reads 8.8 lbs. You applied 1.2 lbs.
Calculate Your Rate
Your test area = 25 feet x spread width. Your rate = (lbs applied / test area) x 1,000. Example: you applied 1.2 lbs across a 25-foot strip that was 8 feet wide. Test area = 25 x 8 = 200 sq ft. Rate = (1.2 / 200) x 1,000 = 6.0 lbs per 1,000 sq ft. If your target was 3.0 lbs/1,000, you are applying double. Drop the dial 2 to 3 clicks and run it again.

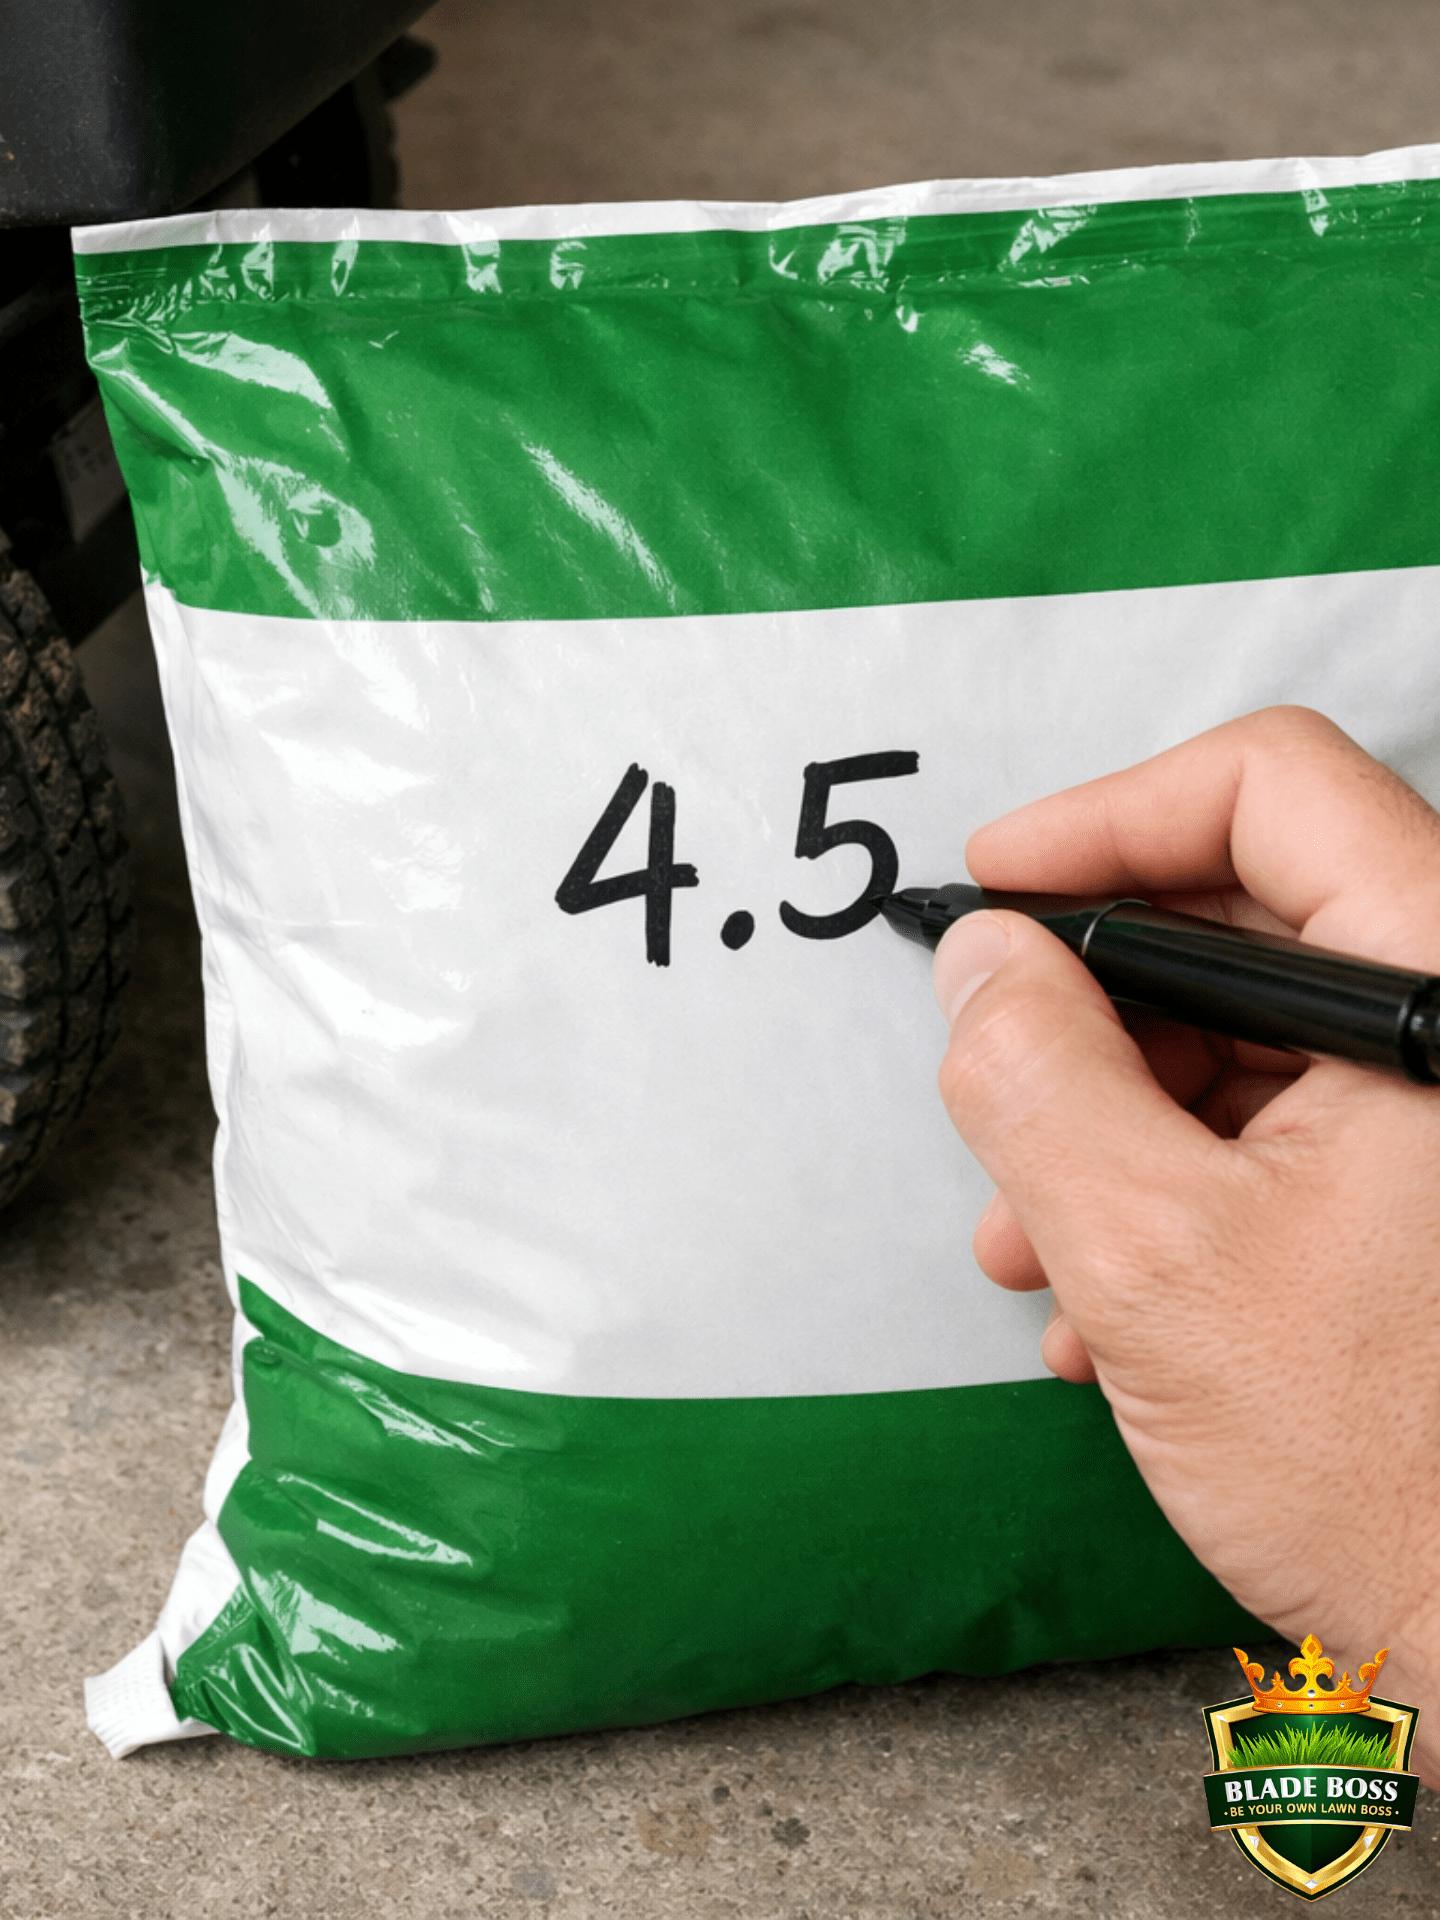
Once you nail the correct setting for a product, write it directly on the bag with a Sharpie. Next time you grab that same product, the answer is right there. No retesting. Build a library of verified settings over time and you will never guess again.
A Worked Example (Start to Finish)
Let's say you are applying Scotts Turf Builder (32-0-4) to a 5,000 sq ft lawn. The bag says 12.5 lbs covers 5,000 sq ft, so your target rate is 2.5 lbs per 1,000 sq ft.
You load 10 lbs, set the dial to 3.5, walk the strip, and weigh the hopper: 9.35 lbs remaining. That means you applied 0.65 lbs across 175 sq ft (25 x 7). Rate = (0.65 / 175) x 1,000 = 3.71 lbs per 1,000. That is 48% above your 2.5 target. Drop the dial to 2.5, run it again. Now you measure 0.47 lbs applied. Rate = (0.47 / 175) x 1,000 = 2.69 lbs per 1,000. That is within 8% of your target. Good enough.
Rutgers Extension says within 10% of your target is acceptable for residential lawns. UMass Extension recommends within 5% for maximum precision. For most homeowners, 10% is the practical goal. If your target is 3.0 lbs/1,000, anything between 2.7 and 3.3 is a good result.
Calibrate Every Product (Not Just Once)
This is the detail that separates calibrated lawns from striped lawns. You cannot calibrate once and assume that setting works for everything in your garage. Every product has a different granule size (measured as SGN, or Size Guide Number), a different density, and different flow characteristics.
| Product | SGN (Granule Size) | Density | Flow Rate at Same Setting |
|---|---|---|---|
| Scotts Turf Builder | Small (~150) | Dense | Fast, narrow stream |
| Milorganite | Large (~250) | Light | Slow, wide spread |
| Lesco 24-0-11 | Standard (~240) | Medium | Moderate |
| Jonathan Green | Medium (~200) | Medium | Moderate |
A setting that delivers 2.5 lbs/1,000 of Scotts Turf Builder might deliver 8 lbs/1,000 of Milorganite at the exact same gate opening. That is not a small difference. That is the difference between a fed lawn and a burned lawn.
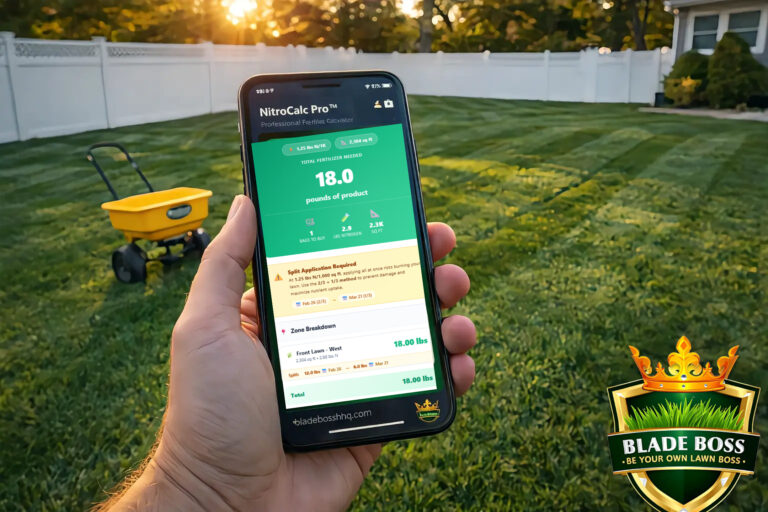
Skip the Math with the Fertilizer Calculator
Enter your lawn size, your product, and your target N rate. Get exact pounds of product needed and a starting dial setting for your spreader model.
The Driveway Pre-Check
Before you run the official 25-foot test on your lawn, do a quick pass on your driveway or sidewalk. Spread a short strip on concrete and look at the pattern from above. You are checking two things: Is the spread even from side to side? And is there a concentrated dump line under the wheels?
If you see heavy lines directly under the wheel tracks, you have the Scotts wheel striping problem. The impeller sits below the wheel tops and product is collecting in the hollow wheels instead of being thrown over them. Fixes: walk faster (3 mph minimum), spray cooking oil on the inner wheel surfaces, or line the inside of the wheels with duct tape. Our spreader settings guide covers this in detail with 5 specific fixes.
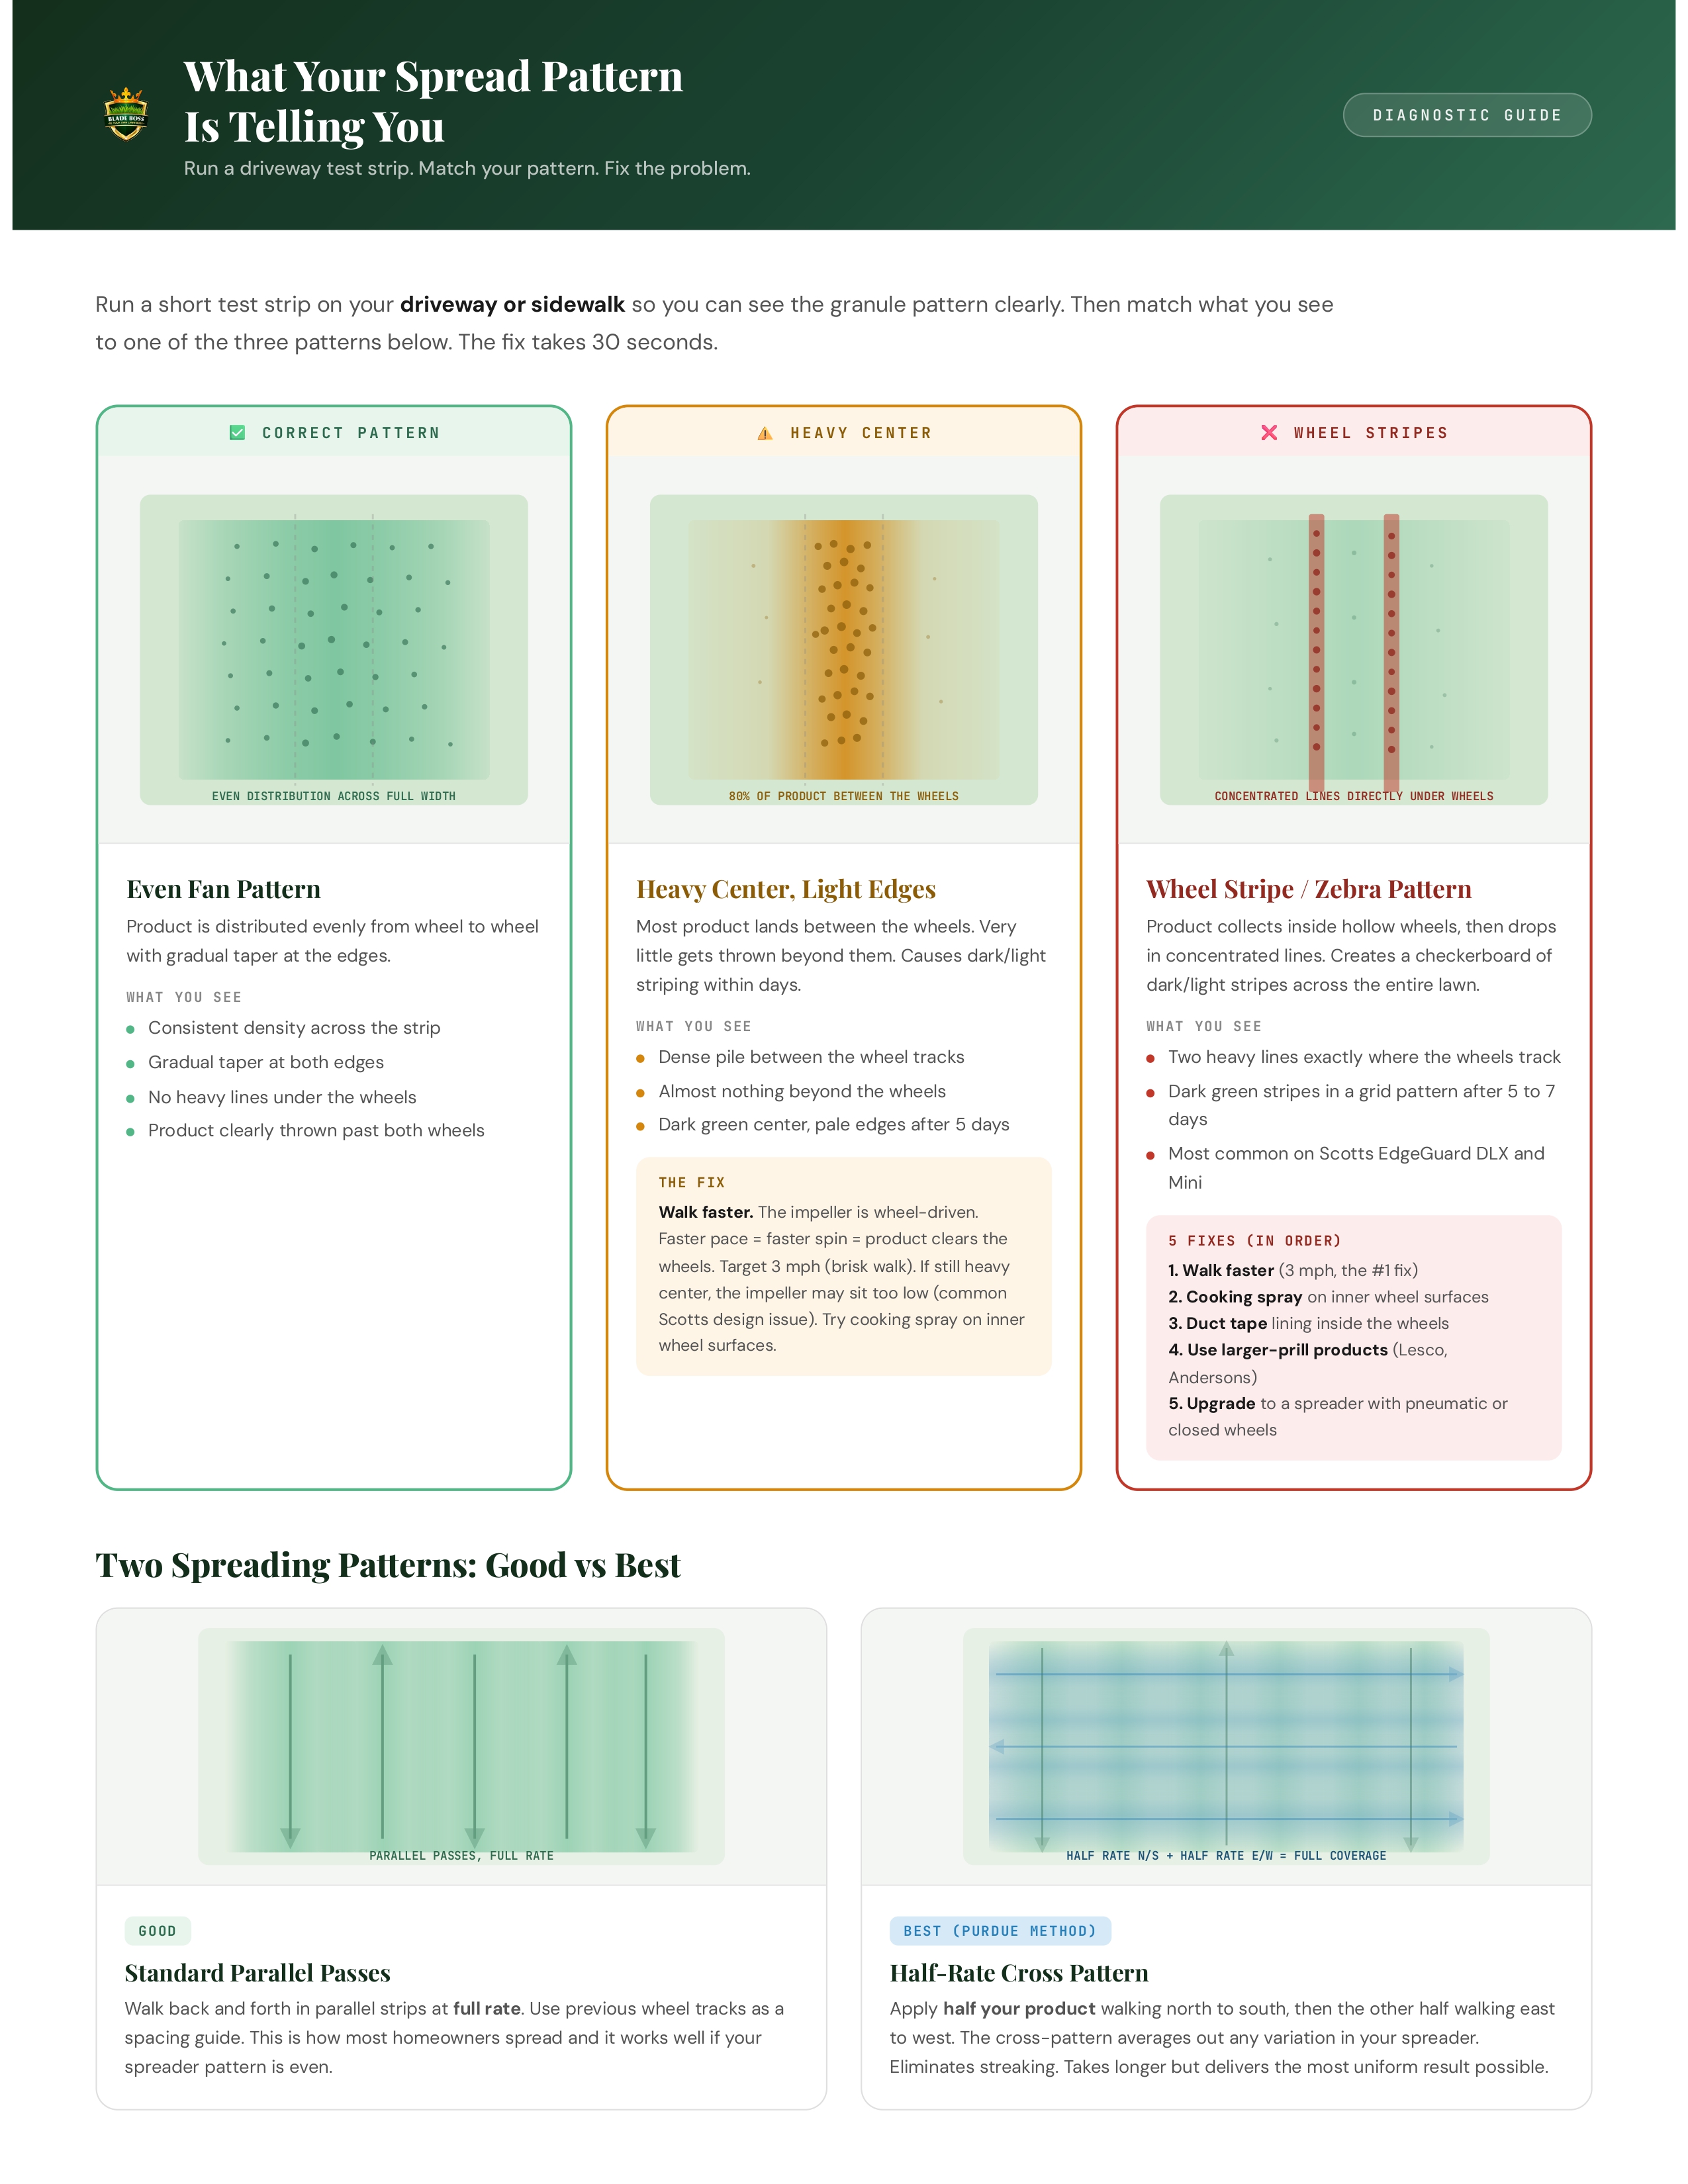
Spreading Technique (The Other Half of Accuracy)
Calibration tells you the right setting. Technique determines whether the product lands evenly. Both matter.
- Perimeter first. Walk the perimeter of your lawn with the EdgeGuard on (if your spreader has one). This creates a clean border and prevents overthrow onto sidewalks and beds.
- Fill the interior. Walk parallel strips back and forth. Use your wheel tracks from the previous pass as a spacing guide. Scotts recommends 5-foot spacing for the EdgeGuard DLX and Mini.
- Never stop with the gate open. Close the gate before you slow down at the end of each pass. If you stop or turn with the gate open, you dump a concentrated pile right where you are standing.
- Maintain consistent speed. Speeding up and slowing down changes the rate. Find your pace on the first pass and hold it.
- For maximum uniformity: go half-rate in two directions. Purdue's turfgrass program recommends applying half your product walking north to south, then the other half walking east to west. This cross-pattern averages out any variation in your spreader. Takes longer but eliminates streaking.
Common Calibration Mistakes
Walking slower during the test than during real spreading
The most common mistake. When you know you are being tested, you naturally walk more carefully and slowly. But slower walking means slower impeller spin, narrower spread, and a higher concentration per square foot. Walk the test strip exactly the way you walk when you are just trying to get the lawn done before dinner. Natural pace, not careful pace.
Only testing once and calling it done
One test tells you where you are. It does not tell you where you need to be. If your first test shows you are 40% over target, you need to adjust the dial and run it again. Most calibrations take 2 to 3 runs to dial in. That is normal. It still only takes 10 minutes total.
Using a different product to test than what you are actually applying
Testing with grass seed and then applying fertilizer at the same setting does not work. The products have completely different granule sizes and densities. Always calibrate with the exact product you are about to apply.
Measuring to the edge of stray granules instead of the effective band
Every spreader throws a few rogue granules beyond the main pattern. Ignore them. Measure the effective width where you see consistent, even coverage. The stray granules outside that band are not contributing meaningful product to those areas.
Why This Matters Even More on Long Island
Long Island sits on top of a sole-source aquifer. Every drop of our drinking water comes from the ground beneath our lawns. Excess nitrogen that leaches past the root zone (because you applied 67% more than you needed) goes straight into that aquifer. Nassau and Suffolk Counties have among the strictest fertilizer regulations in the country for exactly this reason.
And on our sandy soils (CEC of 3 to 8 in most of Suffolk County), over-application is even worse because sand has almost no ability to hold nutrients. They flush straight through to the water table. Calibrating your spreader is not just about lawn aesthetics. It is about applying exactly what your lawn needs and nothing more.
One text when growing degree days reach your next fertilizer window. No spam, just timing.
No spam. One seasonal alert per application window. Unsubscribe anytime.
The Quick Reference Formula
Tape this to the inside of your garage door next to your spreader settings reference:
Test Area = 25 feet x Spread Width. Rate = (Pounds Applied / Test Area) x 1,000.
Cornell Cooperative Extension Spreader Calibration Method
That is the whole formula. Two lines of math. Everything else is just walking and weighing.
All 9 product settings, the SiteOne conversion chart, and the calibration method on a printable 2-page card. Tape it inside your garage door.
See what Blade Boss members get and get access to the fertilizer calculator, lawn mapping tools, and zone-specific timing alerts that take the guesswork out of every application.
See Plans →Chris is a Combat Search and Rescue pilot turned airline pilot who built Blade Boss to bring military-grade precision to backyard lawn care. He calibrates every product on his own Ronkonkoma lawn before recommending a setting to anyone.
Related Reads
Now that your spreader is dialed in, the spreader settings guide gives you verified label settings for 9 products plus the SiteOne conversion chart. The fertilizer calculator guide walks you through the lbs-per-1,000 concept so you know exactly what rate to target. And the fertilizer schedule tells you when each application happens throughout the year.
Frequently Asked Questions
How often do you need to calibrate a spreader?
You need to calibrate for every product you use. Different fertilizers have different granule sizes, densities, and flow characteristics. A setting that delivers 2.5 lbs per 1,000 of Scotts Turf Builder might deliver 8 lbs per 1,000 of Milorganite at the same gate opening. Write the verified setting on each bag with a Sharpie so you only have to test once per product.
What is the 25-foot calibration method for spreaders?
The 25-foot method (developed by Cornell Cooperative Extension) measures exactly how much product your spreader delivers across a known area. You load a weighed amount of product, walk a 25-foot strip at your normal pace, measure the spread width, then weigh what remains. The difference tells you your actual application rate in pounds per 1,000 square feet.
How accurate does my spreader calibration need to be?
Rutgers Extension says within 10% of your target rate is acceptable for residential lawns. UMass Extension recommends within 5% for maximum precision. For most homeowners, hitting within 10% is the practical goal. If your target is 3.0 lbs per 1,000, anything between 2.7 and 3.3 is fine.
Why do bag settings not work for spreader calibration?
Bag settings are generic starting points based on factory testing with a brand-new spreader at a specific walking speed. Your spreader has wear on the impeller and gate mechanism, you walk at a different speed, humidity affects granule flow, and product density varies between bags. A homeowner tested the bag-recommended setting and measured 67% more product than the target rate.
Can you calibrate a spreader on your driveway instead of the lawn?
Yes. Running a test strip on concrete or asphalt lets you visually see the spread pattern, check for wheel striping issues, and sweep up the product for reuse. It is a good first check before moving to the lawn. The lawn test is more accurate for measuring actual delivery rate because granules interact differently with turf than with hard surfaces.
Keep Reading
 DIY How-To
How Much Fertilizer Does Your Lawn Actually Need? (Calculator Inside)
Stop guessing with bag rates. Learn the 4-step nitrogen math, see the Zone 7B fertilizer schedule backed by...
 DIY How-To
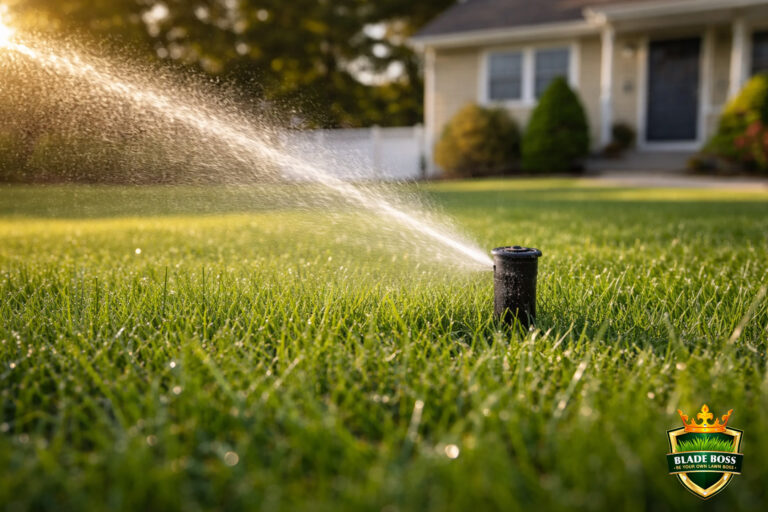
Long Island Lawn Irrigation Guide: How Much Water Does Your Lawn Actually Need?
Long Island gets 46 inches of rain a year. Your lawn still needs supplemental water. Learn exactly how...
 DIY How-To
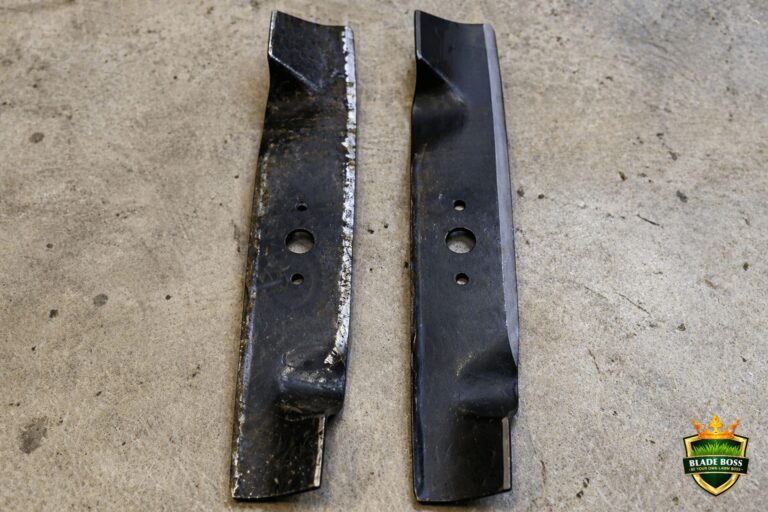
How to Sharpen Mower Blades: The Most Overlooked Lawn Tip on Long Island
Dull mower blades tear grass instead of cutting it. That brown tinge 2 days after mowing? That's torn...
Level Up Your Lawn Game
20+ pro calculators, satellite lawn mapping, and USDA zone-specific schedules. Built for Long Island and Northeast homeowners.
Create a free account to join the conversation.